Showing posts with label project. Show all posts

Tuesday, December 11, 2012

Tiny Paper Stars


Is there a TV series that you need to catch up on?  Downton Abbey?  Big Bang Theory?  Battlestar Gallactica?  Good.  You can make these little teeny stars while you do that.  All you need is paper and scissors.  And strong fingernails.  You'll find out why.  

 When I say "little teeny", I mean about the size of a tic-tac.  But they are so adorable!!

 Ok, this is the worst part of the project.  You'll need strips of paper about a quarter of an inch wide by 8.5 inches long.  I suppose you could use graph paper to have the straight lines already, which would be handy.  I, luckily, have a paper cutter at work, so this part went pretty quickly.
  
 Now, you'll be tying a knot in the paper strip, so take one end of the strip, and loop it over...  

...and then back through itself.  Shimmy it around until the paper makes a 5-sided knot.

Like this.  Try to make sure that each side of the knot is exactly the width of the paper strip.  I know it sounds tricky, but just be sure that the paper isn't scrunched up where it enters/exits the knot.  Also, be sure that it's not loosey-goosey.  So, no scrunching and no loosey-goosey.  I believe these are the technical terms.

If your knot has some of the short end hanging out (like mine did in the last picture), you can trim it off.  Start folding the rest of the strip around itself; for example, in this picture, I am going to fold the strip up, along the bottom of the pentagon.  Then I'll turn the pentagon over and continue folding it around itself.  

Kind of like this.  Once you start doing this, it will make a lot more sense!

 When you get to the end of the strip, tuck it into one of the little pockets formed by the folds.  

You end up with this little guy!  It will be pretty thick.  

This is where strong fingernails come in handy!  Using your nail, press in on one of the sides of the pentagon, while you hold two of the other sides.  Try to hold it like in this picture (rather than flat between your fingers), otherwise the star won't poof out properly.  More technical terms...

I have possibly the weakest fingernails known to man, so they can never work this part right.  I use the edge of my scissors to push in the sides, but you could really use anything with a sharper edge.
Push in all the edges like that, and now you have a little star!  A little, teeny star.

You really could make one of these in less than a minute.  Use colored paper, use graph paper, add a little rhinestone to the center.  Make ten or twelve, and stick them into a clear ornament with some glitter.  Put them on a homemade card. 

Am I sounding bossy yet?

One word of advice: you can make these bigger, but you need to use thicker paper.  Try cardstock or doubling up on strips of regular computer paper.  The reason these work out when they are tiny is that there are so many layers of paper, so you need to try to replicate that thickness in a larger star.  

Whew!  Finally a craft without felt!  Told you I could do it!

(Oh, and I originally learned how to do these on this cute blog...)

Tuesday, December 4, 2012

Pyramid Christmas Trees: Or, "How to Have a Christmas Tree Without Having a Christmas Tree"

I promise that I do crafts that DON'T involve Christmas or felt. You guys just caught me on a series of weeks where felt was on sale and CHRISTMAS IS RIGHT AROUND THE CORNER! Can you believe that we are almost there already?
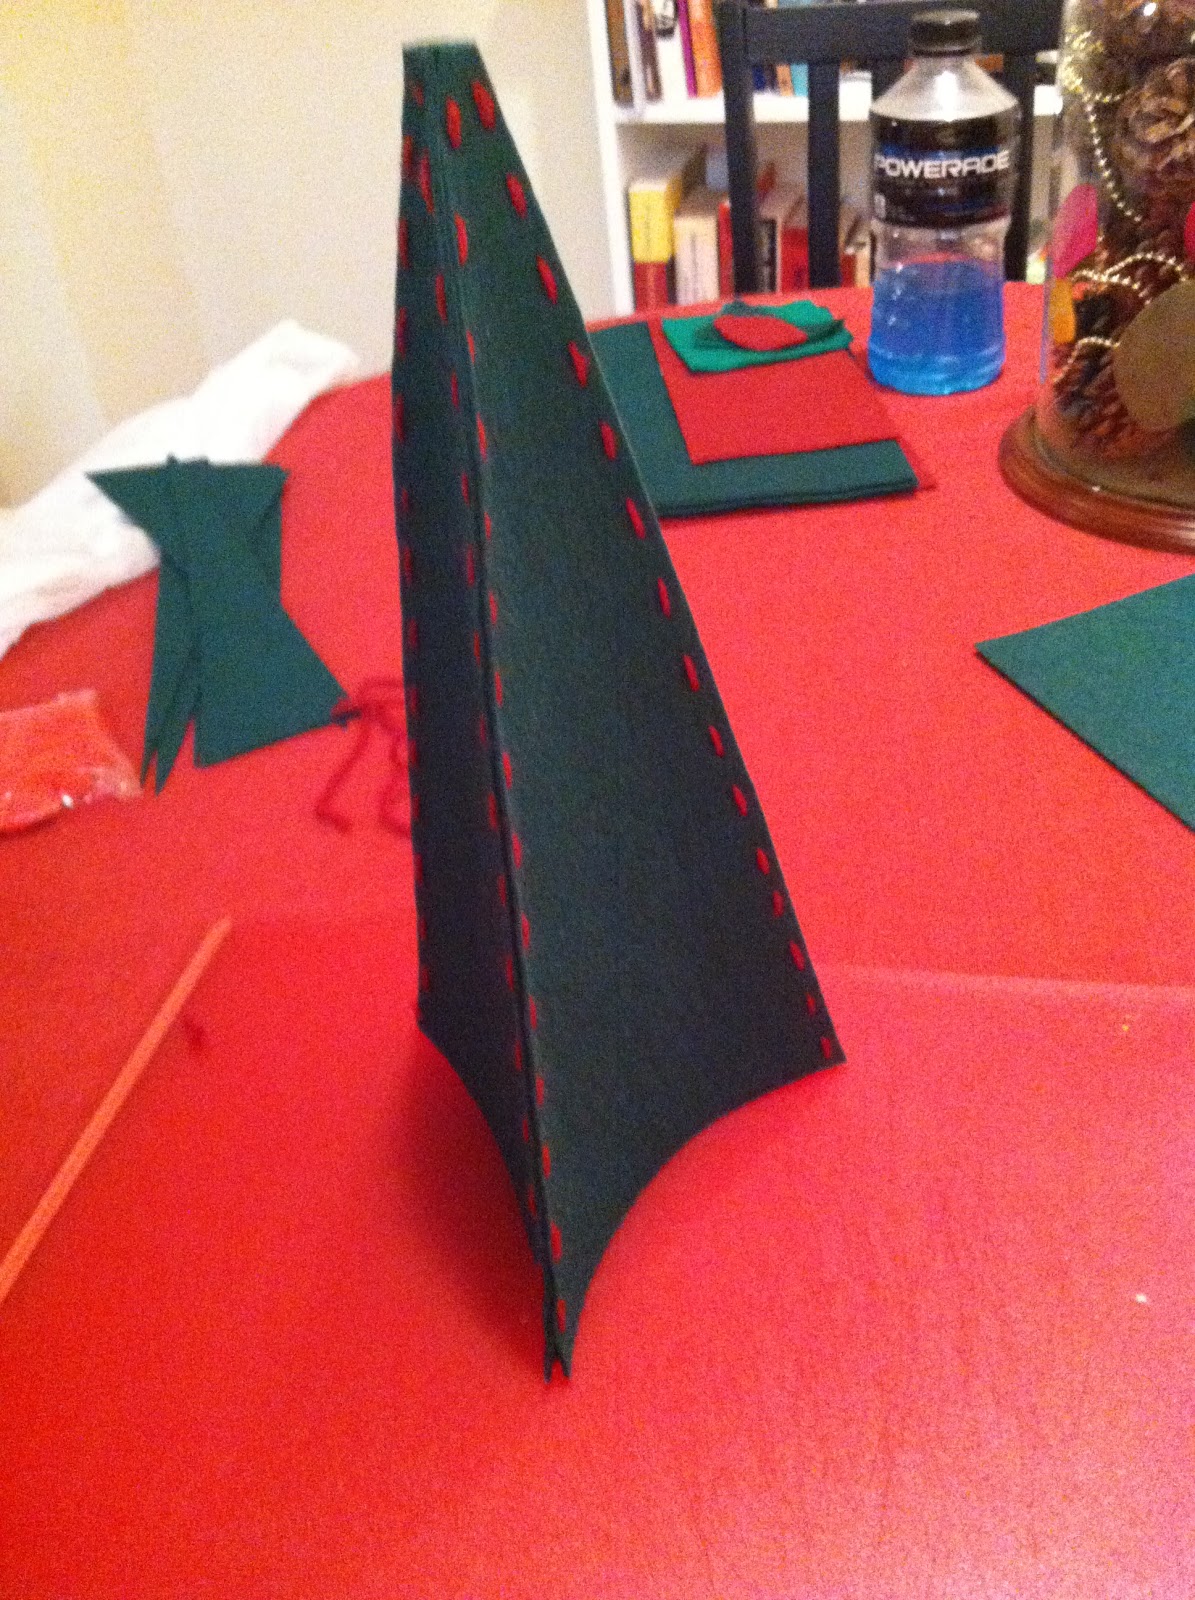
These felt trees were a cinch to make; it took me less than an episode of Glee to complete all three of these little guys, and I love the mod shapes! All I needed for this craft was two (12"x18") sheets of stiff felt, yarn, small scissors (or something else that's sharp and pointy), and an embroidery needle.
Start out by cutting out three triangles of the same size. They need to be pretty precise, to keep from being lopsided, unless you're going for the Dr. Seuss look.
Stack two of the triangles on top of each other, and use the scissors (or your own choice of sharp and pointy objects) to poke little holes at regular intervals through both pieces of felt.  This will make it much easier for you to get the embroidery needle and thread through. 
Sew up the tree!  It's a little difficult to describe, but just remember that you're making the three triangles into a 3-sided pyramid.  You'll need to sew up all of the sides that meet. 
Ta-daa!  You've made a little tree!  I made little pom poms (again, I know) to go on top of each tree, and grouped them together with a vase full of branches (which I glitter-painted), threw some ornaments up, and called it a day!

I'm a pretty big fan of this set-up: no pine needles all over the place, no sap, and I can use every single bit of this again next year!  Also, I made some bags in which to wrap my gifts, and how much fun is that fabric?! 
I promise that the next how-to will be felt-free and fabulous! 

Tuesday, November 27, 2012

It FELT A Lot Like Christmas!

Do you like that pun in the title? Because this is a felt garland?? Get ready for a lot of that type of comedic gold, my lovelies!

These little sheets of felt are quickly becoming my favorite craft supply--they are only 34 cents each and I only used two full sheets for this whole garland. This glitter glue has lasted me through a lot of hard times and crafty adventures, and comes in a close second on the "Favorite Craft Supply" list.

I cut a whole bunch of different Christmas-yshapes from the felt, and embellished with the gold glitter. I made holly leaves and berries, Christmas trees, ornament shapes, and used little red pom-poms that I had on hand from a previous ill-advised project.

Once the glitter had dried, I threaded the pieces using an embroidery needle and red yarn, then hung it on up! This is really my kind of decorating, because I'm not wild about the bright green and red, store-bought Christmas look. I much prefer the handmade look, and I think this fits the bill perfectly! Are you making any of your own decorations this year? I'd love to hear about them in the comments!
 

Friday, July 13, 2012

Crafty Friday: Embroidered Earbuds

I have an iPhone that I love dearly.  It came with Apple earbuds, which I do not love as dearly.  They are constantly getting tangled in my purse, and I really don't want to have to carry around a small tool specifically to wrap my headphones around, as it will inevitably get lost in my bag.  What to do?
Wrap them up with embroidery thread!  They'll look like friendship bracelets for your ears.
I followed this great tutorial.  I already have TONS of embroidery thread in my craft box, I had lots of time over the second weekend JP was gone, and Netflix is chock full of 90s romantic comedies to watch while knotting.  Throughout the all-day crafting, I watched Sleepless in Seattle, My Best Friend's Wedding, and  She's All That.  Don't worry, though; Mia made sure I got frequent breaks to play tug-of-war, scratch-my-ears, and take-me-out. 
I'm so happy with the way these turned out!  Very cute, very girly, very un-tangled.  I added a dab of clear nail polish to each knot to keep it secure, and it's held up well for two weeks now.  They are a bit heavier now, so I wouldn't take them for a run as they may not stay as well in your ears while bouncing around.  My iPod shuffle earbuds are shorter, though, and less prone to tangle; how nifty!

Tuesday, November 22, 2011

Fall Leaves Garland

This year, JP and I will be making the trek over to the great midwest to spend Thanksgiving with mi madre and Brent.  I've said it before, and will say it again, I love road trips!  We've got audiobooks, tasty treats, and I'm finishing up some knitting on the drive; what more could you need for a lovely day?
Because of the lengthy drive (somewhere between 12 and 14 hours, depending on traffic), we got out of food duties for Thanksgiving dinner.  Instead, I'm in charge of the table decorations, and bringing plenty of candy cane Joe-Joes (Trader Joe's makes CCJJ each year, just during the holidays, and we hoard boxes for the off-season.  They're so terribly delicious!).  This garland acted as my inspiration, although my colors aren't quite Thanksgiving-only; I bought felt last year for a Christmas craft, and didn't use it.  Regardless, I think they look cute together!
I've got two garlands, and I plan on using them as simple table runners down the middle of the table, and will also put together some napkin rings with leftover leaves.  Combine this with some squirrel placecards bought at Paper Source and a list of things we're thankful for, and we'll have a lovely table!  I'll post pictures next week of the final product.

Thursday, September 1, 2011

Espresso

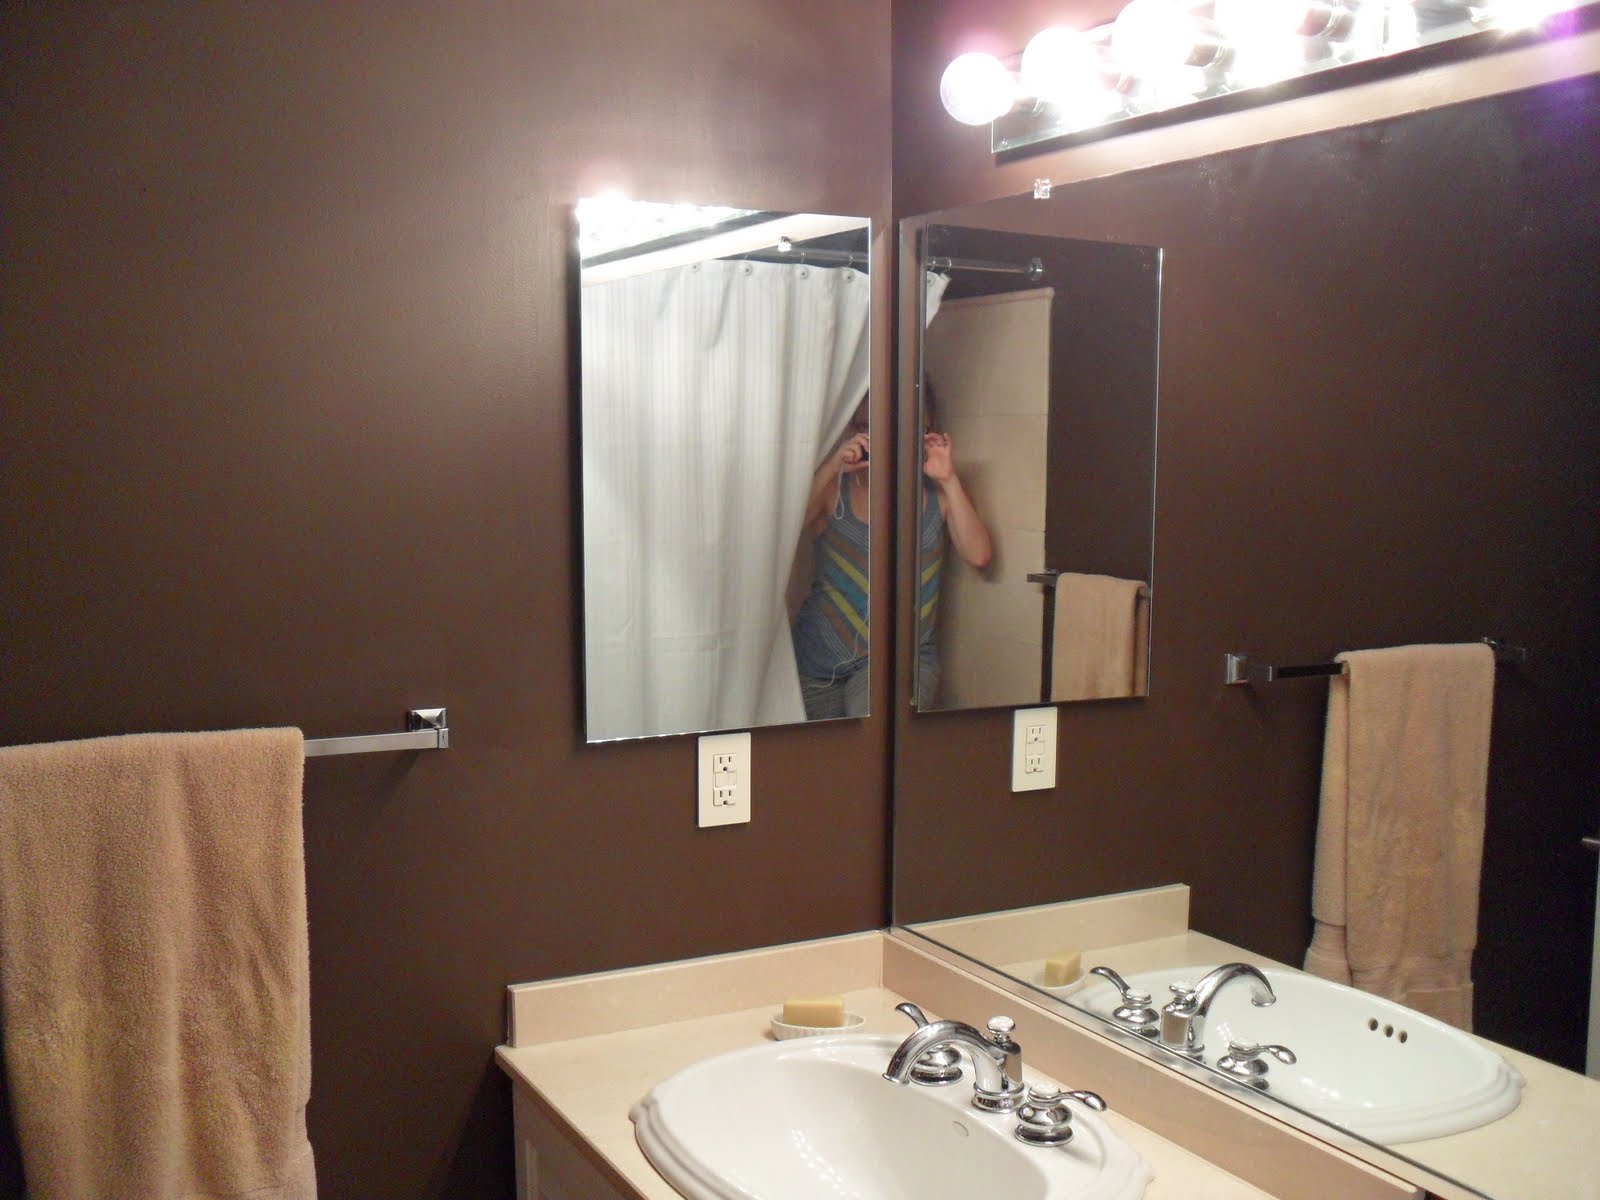
Well, we painted our guest bathroom together.  And lived to tell the tale.
Our guest bathroom has needed a touch-up since we moved in last October; a handyman painted a corner the wrong color when fixing a baseboard, and it's bugged me for months!  
The nice thing about the room is that there's a huge mirror spanning most of one wall, and lots of lights above the mirror, resulting in a room that looks much bigger than it actually is.  Thanks to the forethought of the first guy who lived there, it's one of those special cases where it can handle being painted a really dark color.  So we went for it: espresso brown.  Or chocolate.  Whatever.  JP and I were pretty excited about it.
But first, we had to tape off the borders (using Frog Tape) and prime the walls.  We did that one weekend, and finished the paint job last weekend, when we had more time to devote to two coats of paint.
Let me say, I'm very impressed with the visual knockout of the new color.  It really gives the room some much-needed depth, and the marble countertops now pop against the walls, rather than blend in.  
The best part is that JP and I survived a house project together!  No raised voices, no issues with techniques.. he even let me listen to Katy Perry and Adele while we painted.  Now that's a good man.
How do you like this shot of us in our comfy clothes?  We like to hang out at home in our bum clothes; please, withhold any judgment.