Showing posts with label dessert. Show all posts
Tuesday, November 26, 2013
Last Minute Toffee
One of my favorite things to pick up at Trader Joe's is their dark chocolate pistachio toffee. It is absolutely to die for: perfectly salty, sweet, crunchy, rich. The process of making toffee has always kind of intimidated me, as it involves a candy thermometer and crazy-hot butter and sugar, plus I feel like clean-up is awful with that stuck to the pan.
On Monday night, though, I needed to make something for my nursing group's Thanksgiving treat exchange. I'm a bit over cookies for the time being, and have to make three pies for Thursday, so wanted a new challenge. While flipping through the Smitten Kitchen cookbook, I summoned the courage to try this toffee recipe. The ingredient list is pretty manageable (though I adjusted it a bit for what I had in the house), and the steps just didn't seem that daunting. Thank goodness I did! This toffee is absolutely delicious, and would probably be even better if you followed Deb's instructions. Mine worked out pretty well, though, so don't be afraid to make a few subtle adjustments, if needed. The main difference is that the book recipe and web recipe (which I link to below) have differing amounts of butter; I went with the book amount, which was only half of what is actually called for online. Still tasty, but I'm sure it would be even more decadent with double the butter.
Last Minute Toffee (adapted from Smitten Kitchen)
8 Tbsp. butter (1 stick)
1/2 c. brown sugar
1/2 c. sugar
1 1/2 tsp. molasses
1/4 tsp. flaky sea salt (I used pink himalayan)
1 1/4 c. dark chocolate chunks
1/2 c. pistachio halves
1. Line a small baking sheet with parchment paper or silicon mat.
2. In a medium heavy saucepan with candy thermometer attached, melt butter, sugars, molasses, and salt. Cook over medium heat, stirring occasionally with a whisk until temperature approaches 250 degrees, then stir constantly until it reaches 300 degrees.
3. Pour immediately onto prepared baking sheet and sprinkle with chocolate. Let sit for a minute to melt while you fill your now-empty saucepan with hot water so it's easier to clean. Use an offset spatula to spread chocolate over toffee. Add pistachios and let sit overnight, or until hardened.
4. Break into smallish pieces, package, and be ready for compliments.
Wednesday, November 20, 2013
Lactation Cookies
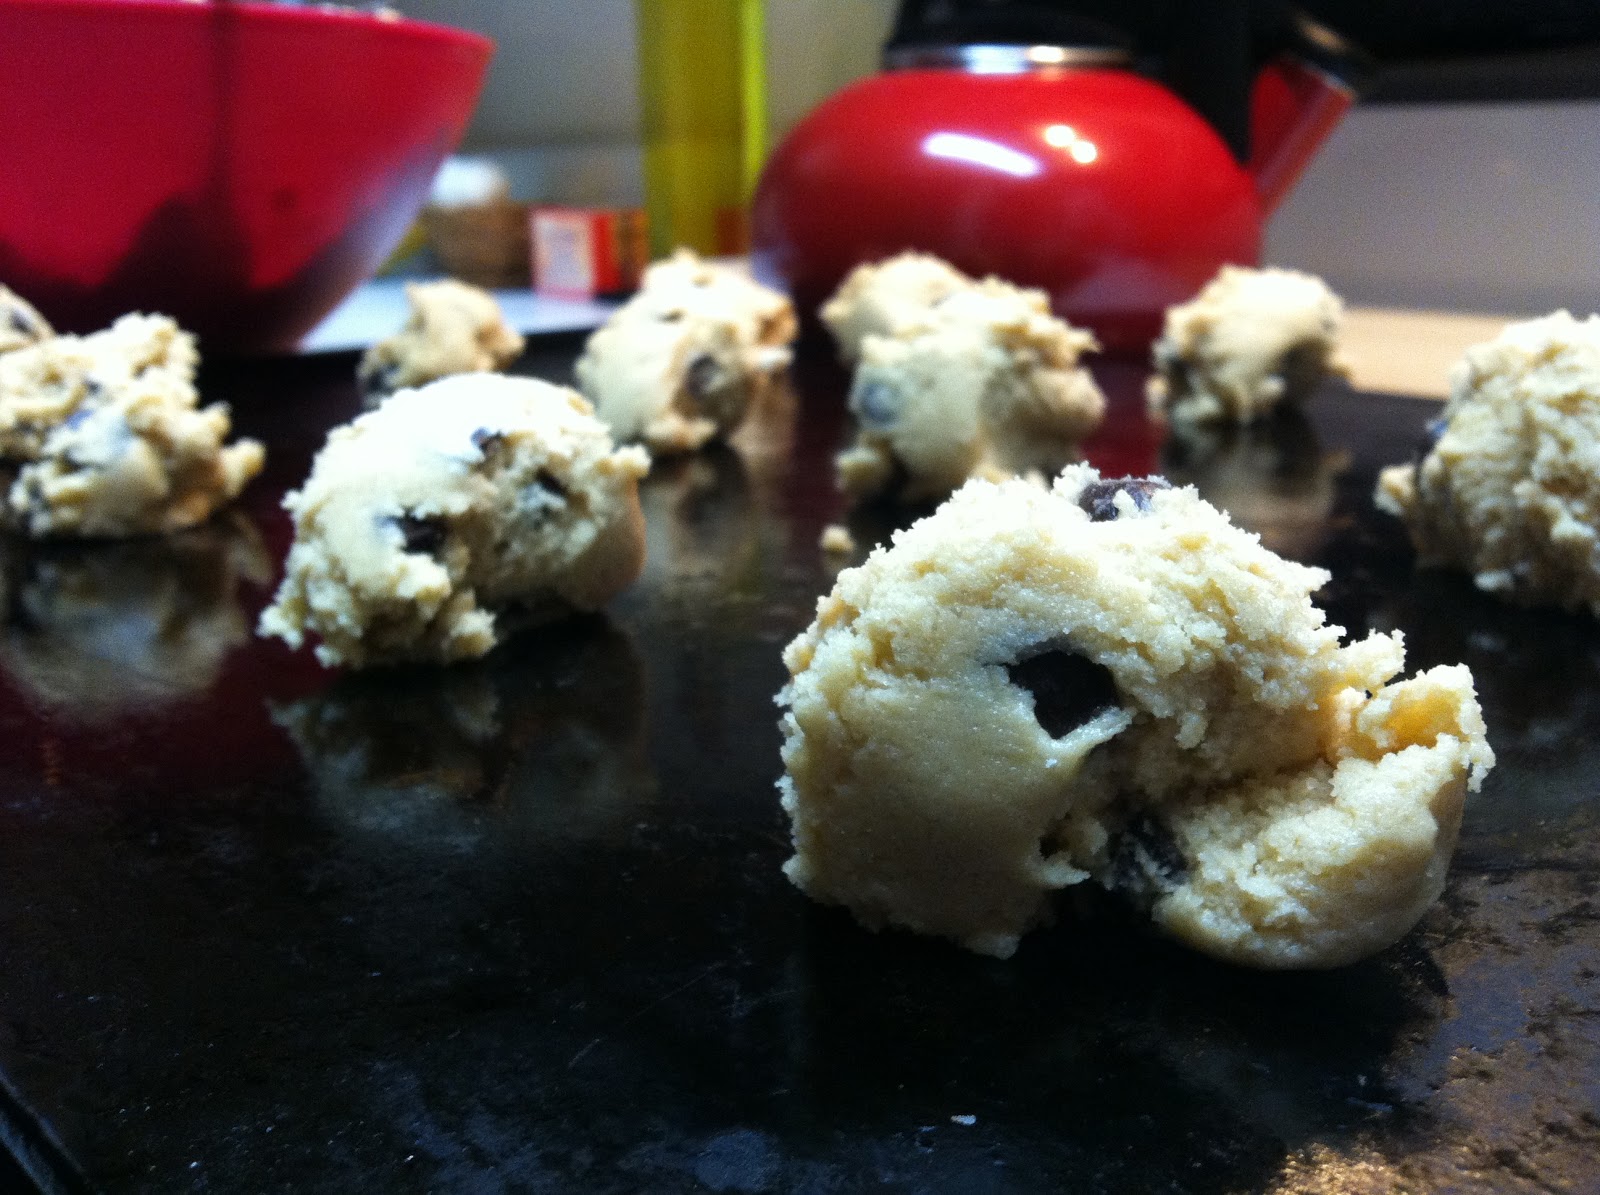
This recipe is gold in my kitchen. I can't tell you how many of these chocolate chip cookies I've eaten since August came onto the scene; it's probably for the best that the number remain a mystery. Let's just leave it that easily over 10 dozen have been made, and I'm the only lactating woman in the house.
However, I would like to state that, if you are not a nursing mama, these cookies will not have you leaking through your shirt. Let's just get that out of the way. The rumor is that brewer's yeast, oatmeal, and flaxseed are all great to increase a nursing mom's milk supply; the B12 in oatmeal is awesome, lots of omega-3 fatty acids in flaxseed, and the yeast has lots of iron, protein, and other B vitamins. The lactation consultant who leads my nursing group said that, while all of that is good, the biggest thing about lactation cookies is that they give moms the extra calories they may be missing. Breastfeeding requires about 500 extra calories a day to maintain weight, so these cookies can help you out if you're under that.
Plus, they are totally delicious. There are lots of recipes online if you google it, but this is my favorite. I like to mix up the extras; this time, I added chocolate chips, shredded coconut, peanut butter chips, and pistachios. Weird, but it totally works. You can also try dried cranberries, almonds, I've even substituted granola for the oatmeal. Make it your own!
And, if the whole brewer's yeast isn't for you, you can leave it out. It adds a nice heartiness to the cookies, though, so give it a shot before automatically saying no.
Lactation Cookies (adapted from Mama Say What)
1 c. softened butter (can substitute coconut oil)
1 c. sugar
1 c. brown sugar
4 Tbsp. flaxseed
2 eggs
1 Tbsp. vanilla extract
2 c. flour (can use whole wheat or all-purpose)
1tsp. salt
1 tsp. baking soda
3 Tbsp. brewer's yeast
3 c. rolled oats (not instant)
1.5 c. mix-ins (chocolate chips, dried cranberries, nuts, peanut butter chips, coconut, etc.)
1. Beat butter and sugars in standing mixer until pale and fluffy. Add in flaxseed, eggs, and vanilla; beat until combined.
2. Slowly beat in flour, baking soda, salt, brewer's yeast and oats. Once combined, remove mixer from stand, and stir in mix-ins.
3. Use an ice cream scoop to drop batter onto baking sheet, and bake at 375 for 8-10 minutes, until golden. Cool for 5 minutes before devouring.
Labels:
chocolate chips,
cookies,
dessert,
lactation cookies,
recipe,
snack
Tuesday, November 12, 2013
Pumpkin Bread (with Chocolate Chips!)
Hey guys, I feel silly stating the obvious, but it's definitely pumpkin season. Maybe you've seen the insane number of pumpkin spice lattes being advertised? I can never fully get behind them- far too sweet and overmarketed for me. Which isn't to say that I don't enjoy pumpkin; when pureed, it adds moistness for a bread that suits the fall perfectly. This recipe is divine with a cup of earl grey tea in the afternoon, or a pat of butter for breakfast. It will keep for days, and even makes two loaves! When it comes to pumpkin, think outside the cup.
Pumpkin Bread (with Chocolate Chips!) (from Babycenter Blog)
3 c. all purpose flour
1 tsp. cinnamon
1/2 tsp. nutmeg
1 tsp. baking soda
1 1/2 tsp. baking powder
1 tsp. salt
1 c. brown sugar
1 c. white sugar
3/4 c. Greek yogurt
3 eggs, lightly beaten
15 oz. can pumpkin puree
1/2 c. applesauce
1 tsp. vanilla extract
1 c. chocolate chips
1. Preheat oven to 350.
2. Combine flour, spices, salt, baking soda, and baking powder in a medium bowl.
3. In a separate medium bowl, combine sugars, then add yogurt, eggs, pumpkin, applesauce, and vanilla; whisk until smooth.
4. Slowly add dry ingredients to wet and stir until combined. Add chocolate chips, then divide batter between two greased 9x5 loaf pans. Bake 50-60 minutes, until an inserted toothpick comes out clean.
Monday, June 3, 2013
Blueberry-Lime Bundt Cake
Happy Monday, y'all! I'm so sorry for the long absence, although must admit that it was restorative and I took plenty of naps. All is well here in TLP, just taking a breather to try out some tasty new recipes (like this one), try my hands at some crafts (most of which involve spray paint), and, of course, lots of prepping for the churro. There's a lot to catch up on, so let's get started!
One of my neighbors had a baby in mid-April, and I wanted to bring her something moderately sweet and easy to eat as a congratulations/please help me finish this dessert gift. I whipped up this perfectly moist, pleasantly (aka not tooth-hurtingly) sweet summer cake and she was most appreciative. (The baby is pretty darn handsome, too!)
Bundt cakes are my go-to when I feel like baking something that will impress without the time and effort of cupcakes (too much frosting involved), cookies (all the batches and waiting around in the kitchen between), or especially layer cakes. For this dessert, just get some fresh blueberries and limes, mix everything up in a bowl, bake, and sprinkle with some powdered sugar. Enjoy some with coffee at breakfast, or sneak a midnight taste. There's less guilt and more opportunities for appreciation. Who doesn't need that?
Blueberry-Lime Bundt Cake (from Joy the Baker)
1 1/2 c. sugar
1 Tbsp. fresh lime zest
3 c. flour
1 Tbsp. baking soda
1 tsp. salt
1/4 tsp. nutmeg
3 eggs
1 c. butter, melted and slightly cooled
1 c. buttermilk
1 Tbsp. fresh lime juice
1 c. fresh blueberries
Powdered sugar, for sprinkling on finished cake, optional
1. Preheat oven to 350. Grease and flour a Bundt pan and set aside.
2. In a small bowl, combine granulated sugar and lime zest, then rub zest into sugar to release its essential oils.
3. In a large bowl, combine sugar, flour, baking soda, salt, and nutmeg. In a medium bowl, whisk together eggs, butter, buttermilk, and lime juice.
4. Add wet ingredients all at once to dry ingredients. Stir until everything is thoroughly combined; it should be thick, but not lumpy. Add berries and fold into batter until evenly distributed.
5. Spoon batter into prepared Bundt pan. Bake for 50-60 minutes, until a skewer inserted into the middle of the batter comes out dry. Allow cake to cool for at least 20 minutes before inverted on a wire rack to finish cooling.
6. Once cooled, sprinkle powdered sugar onto cake and serve.
One of my neighbors had a baby in mid-April, and I wanted to bring her something moderately sweet and easy to eat as a congratulations/please help me finish this dessert gift. I whipped up this perfectly moist, pleasantly (aka not tooth-hurtingly) sweet summer cake and she was most appreciative. (The baby is pretty darn handsome, too!)
Bundt cakes are my go-to when I feel like baking something that will impress without the time and effort of cupcakes (too much frosting involved), cookies (all the batches and waiting around in the kitchen between), or especially layer cakes. For this dessert, just get some fresh blueberries and limes, mix everything up in a bowl, bake, and sprinkle with some powdered sugar. Enjoy some with coffee at breakfast, or sneak a midnight taste. There's less guilt and more opportunities for appreciation. Who doesn't need that?
Blueberry-Lime Bundt Cake (from Joy the Baker)
1 1/2 c. sugar
1 Tbsp. fresh lime zest
3 c. flour
1 Tbsp. baking soda
1 tsp. salt
1/4 tsp. nutmeg
3 eggs
1 c. butter, melted and slightly cooled
1 c. buttermilk
1 Tbsp. fresh lime juice
1 c. fresh blueberries
Powdered sugar, for sprinkling on finished cake, optional
1. Preheat oven to 350. Grease and flour a Bundt pan and set aside.
2. In a small bowl, combine granulated sugar and lime zest, then rub zest into sugar to release its essential oils.
3. In a large bowl, combine sugar, flour, baking soda, salt, and nutmeg. In a medium bowl, whisk together eggs, butter, buttermilk, and lime juice.
4. Add wet ingredients all at once to dry ingredients. Stir until everything is thoroughly combined; it should be thick, but not lumpy. Add berries and fold into batter until evenly distributed.
5. Spoon batter into prepared Bundt pan. Bake for 50-60 minutes, until a skewer inserted into the middle of the batter comes out dry. Allow cake to cool for at least 20 minutes before inverted on a wire rack to finish cooling.
6. Once cooled, sprinkle powdered sugar onto cake and serve.
Labels:
blueberry,
blueberry lime bundt cake,
bundt cake,
cake,
dessert,
recipe,
summer
Monday, April 1, 2013
Happy Birthday to Haley!! (Also, a chocolate buttercream frosting)
Take a good, hard look at the face in the photo above.
That face is 25 years old today.
Has 25 ever looked so impossibly wonderful, cute, and sweet?!
Happiest, most wonderful, heartfelt birthday wishes for my incredible younger sister, who has somehow scored in both the personality AND looks department. I couldn't be more glad that you were born!
Slather this frosting on top of any cake, celebratory or not. Its rich, dimensional flavor and velvety smooth texture will make anything taste good. I'm tempted to make a batch and use it as dip for apple and pear slices.
Of course, it is best when showing the people close to us that we love them.
Best Chocolate Buttercream Frosting from Joy the Baker Cookbook, 2012
3/4 c. butter, room temperature
1/2 c. unsweetened cocoa powder
1/2 tsp. salt
2 1/2 c. powdered sugar
2 Tbsp. milk
1 tsp. vanilla extract
1/2 c. heavy cream
1/3 c. Ovaltine powder
1. Cream together butter, cocoa powder and salt. Butter mixture will be very thick. Turn off the mixer, scrape down the sides of the bowl and add powdered sugar.
2. Turn mixer on low and mix in powdered sugar while adding milk and vanilla extract. As the sugar incorporates, raise the speed of the mixer to beat the frosting. Beat until smooth.
3. In a 2 cup measuring glass, stir together heavy cream and Ovaltine. Turn mixer speed to medium and pour cream mixture into frosting in a slow, steady stream until you’ve reached your desired consistency. You may not need the full amount of Ovaltine and cream. (I used it all, for whatever that's worth.)
Happy birthday, Face. I wish I could bake you cakes every day to show you how awesome you are!
Labels:
chocolate,
chocolate buttercream frosting,
dessert,
haley,
recipe
Monday, January 21, 2013
M&Ms and Peanut Butter Rice Krispie Treats
Happy Monday, y'all! Welcome back to the wonderful middle of winter. Haley is living it up in sunny south Florida, spending her days by the grill and wearing tank tops. Meanwhile, Inauguration 2013 fever is at an all-time high up here in DC (are you watching it today?), meaning I can't fight the crowds in Georgetown or muster the energy to bundle up in my down coat for my favorite Baked and Wired rice krispie treats. Thus, the desire to make my own treats at home was born!
These bars are more than enough to lift you out of those winter doldrums. No baking required, so the effort is minimal. You can mix everything in the Dutch oven, meaning less dishes to wash. And feel free to just use peanut butter with no candy, or add your own favorite: butterscotch chips, chopped up Snickers...the only thing that might not work great is gummy bears. But, hey, I'm happy to be proven wrong.
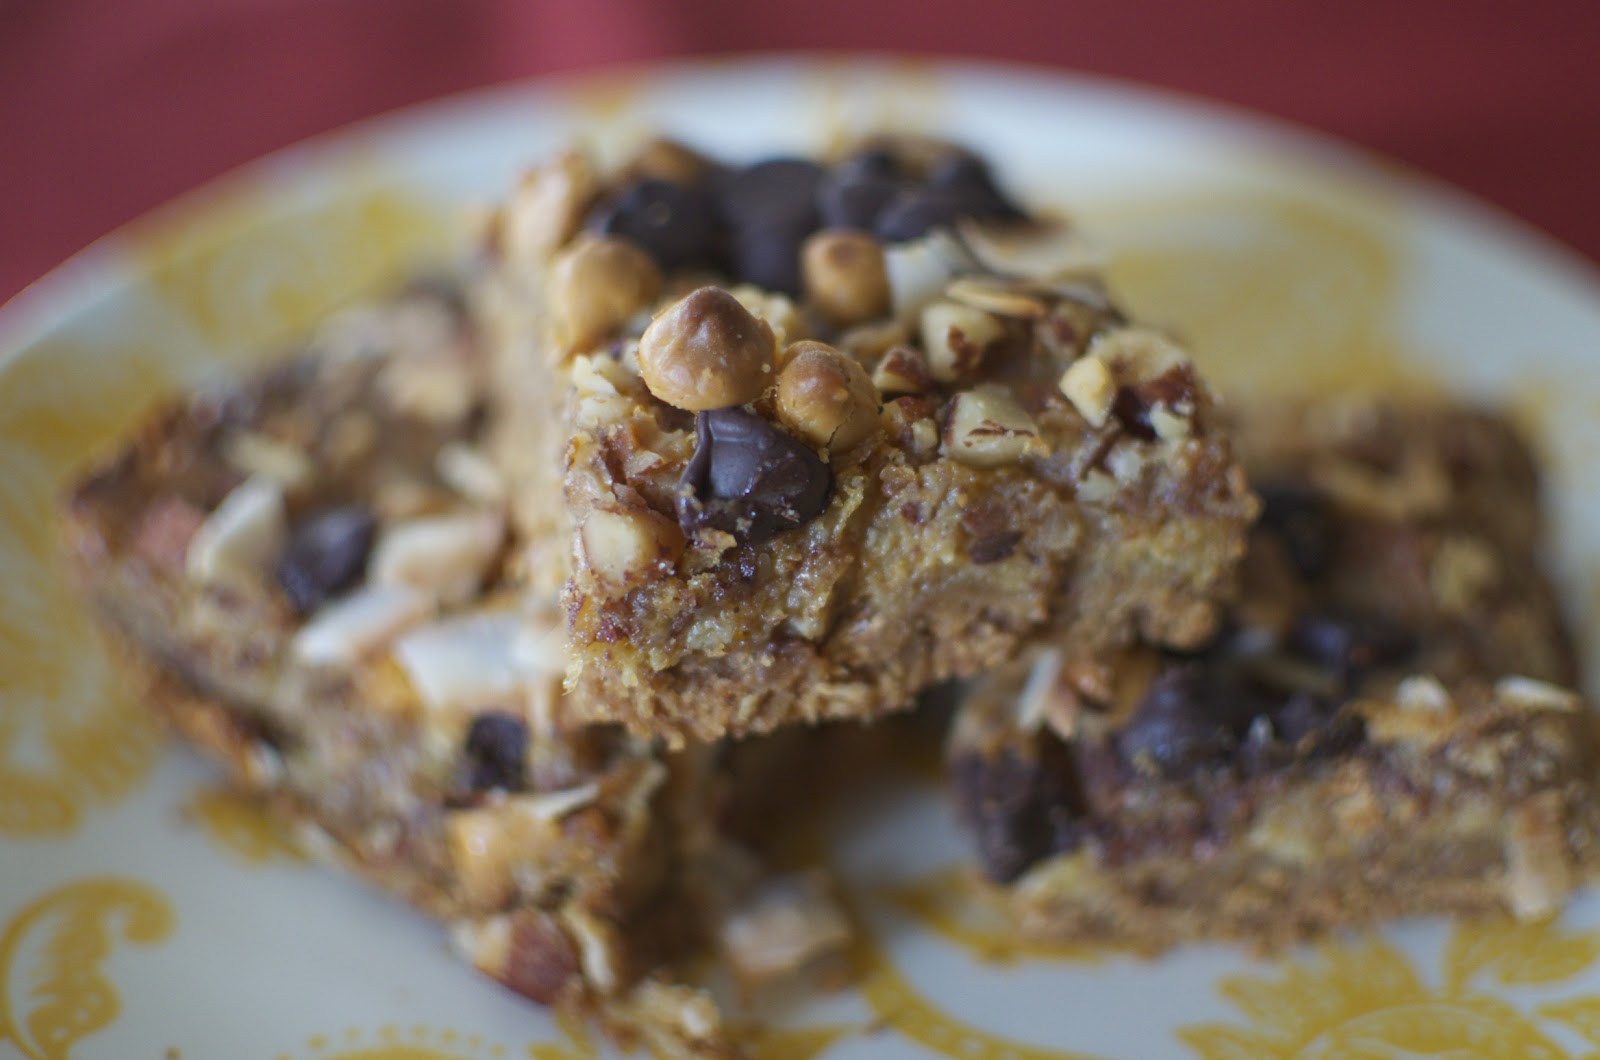
M&Ms and Peanut Butter Rice Krispie Treats (very slightly adapted from Kellogg's website)
3 Tbsp. unsalted butter
4 c. mini marshmallows
1/2 c. smooth peanut butter
1/2 c. M&Ms (regular, but peanut butter version would be soo good!)
6 c. rice krispie cereal
1. In a Dutch oven, melt butter over low heat. Add marshmallows and stir until melted.
2. Turn off heat and mix in peanut butter.
3. Add candy and cereal; stir to combine.
4. Press into a greased 9''x13'' pan, stick in fridge to cool, then slice into your desired bar size. Don't be stingy here.
These bars are more than enough to lift you out of those winter doldrums. No baking required, so the effort is minimal. You can mix everything in the Dutch oven, meaning less dishes to wash. And feel free to just use peanut butter with no candy, or add your own favorite: butterscotch chips, chopped up Snickers...the only thing that might not work great is gummy bears. But, hey, I'm happy to be proven wrong.
M&Ms and Peanut Butter Rice Krispie Treats (very slightly adapted from Kellogg's website)
3 Tbsp. unsalted butter
4 c. mini marshmallows
1/2 c. smooth peanut butter
1/2 c. M&Ms (regular, but peanut butter version would be soo good!)
6 c. rice krispie cereal
1. In a Dutch oven, melt butter over low heat. Add marshmallows and stir until melted.
2. Turn off heat and mix in peanut butter.
3. Add candy and cereal; stir to combine.
4. Press into a greased 9''x13'' pan, stick in fridge to cool, then slice into your desired bar size. Don't be stingy here.
Wednesday, December 19, 2012
Chocolate Hazelnut Crepe Cake
Sometimes it's just a good thing for us to be challenged in the kitchen. To walk into the hearth of the home, and feel undaunted with a crazy new recipe. I think it's good for the soul, and certainly excellent for our self-esteem, to be able to impress with something we've made with our own two hands.
Thus, the decision was made to spend most of Sunday making a 17-layer hazelnut crepe cake. I wanted to show my wonderful DC cousin that her recent birthday did not go unnoticed, and that she is worthy of a wonderfully decadent dessert. I also wanted to face my fears of creating crepes and pastry cream from a handful of ingredients. I'd say both were accomplished.
Crepes:
9 Tbps. unsalted butter (for both crepes and pastry cream)
2 1/3 c. whole milk
6 large eggs
1 1/2 c. flour
1/8 tsp. salt
1/2 c. sugar
Hazelnut pastry cream:
1 c. hazelnuts
1 c. confectioner's sugar
2 tsp. vanilla extract
1/4 tsp. salt
3 1/3 c. whole milk
7 Tbsp. sugar
5 egg yolks
5 Tbsp. cornstarch
butter leftover from crepes
Chocolate ganache:
6 oz. chocolate chips
1/4 c. + 2 Tbsp. heavy cream
1 Tbsp. vanilla extract
Make Crepes:
1. In a small saucepan, brown all butter according to these instructions. Let cool to lukewarm.
2. In a blender, combine milk, eggs, flour, salt, sugar, and 6 Tbsp. browned butter. Cover finished mixture and refrigerate for one hour or up to 2 days.
3. When you're ready to actually cook the crepes, preheat a medium non-stick skillet or crepe pan over medium-high heat. My pan is super non-stick, so I could skip the buttery, but you may want to brush your own with melted butter to ensure nothing clings to the surface.
4. Pour 1/4 c. batter into skillet and quickly swirl it around until it evenly coats the bottom and cook, undisturbed, until the bottom is golden and top is set (1-2 minutes). Carefully flip and cook on other side for 5-10 additional seconds to set. It may take you a couple to get the hang of it, but the batter makes a TON of crepes, so no need to fear. You can do this! There are a few good videos on YouTube to walk you through the process if you want to visualize it; I'd start with this one, and the pouring/flipping starts at the 1:40ish mark.
5. Transfer finished crepes to a plate and just stack; they won't stick together. I found that the batter actually made close to 25 crepes, but you'll only need 16 or 17 for this recipe, as the pastry cream only makes so much.
Toast/Skin Hazelnuts:
1. Preheat oven to 350 and spread hazelnuts on a baking sheet. Toast for 10 minutes, rolling around halfway through. Remove from oven and let cool.
2. Rub nuts between your palms to remove skins, and discard.
Make Hazelnut Pastry Cream:
1. In a food processor, grind nuts, confectioner's sugar, extract, and salt into damp-looking crumbs that combine in small clumps. Do not over mix, or you'll make a hazelnut butter!
2. In a saucepan, combine the hazelnut paste, milk, and sugar over medium-high heat and bring to a simmer, stirring a bit so it doesn't scorch. In a medium bowl, whisk together yolks and cornstarch until smooth. Stream in small spoonfuls of the hot milk into the yolk bowl slowly, until you find that the bowl is hot.
3. Now, reverse. Slowly stir in yolk mixture to milk saucepan, whisking constantly, until the two are combined. Continue whisking while you bring the mixture to a boil and cook for 2 minutes; it should thicken upon boiling, to a loose pudding consistency. Remove from heat and stir in remaining 3 Tbsp. browned butter.
4. Transfer to a bowl, press plastic wrap on top of cream, and refrigerate until set, probably about two hours.
Assemble Cake:
1. Lay first crepe on plate and spread with 1/4 c. pastry cream. Repeat with remaining crepes until you're out of pastry cream. Chill in the fridge until you're ready for the ganache.
Ganache:
1. Melt all ingredients in a double boiler until smooth, but thick. Remove cake from fridge, pour ganache on top and gently push some off the sides, so it's there are a few drips on the edges. Set cake in fridge until the chocolate is set.
Finally....slice and eat!
Labels:
birthday,
cake,
celebration,
chocolate,
chocolate hazelnut crepe cake,
crepe,
dessert,
holiday,
layer cake,
nut,
recipe
Thursday, December 6, 2012
Secret Weapon Chocolate Chip Cookies
I don't admit to being a snob about most things, but chocolate chip cookies is one of them. I like them soft and chewy, maybe even slightly undercooked. Don't give me those crispy cookies! I've always used the Nestle Tollhouse cookie recipe (which is really great and has garnered me many compliments/marriage proposals), but sometimes ended up with crispy/flat/weird-textured cookies. I know, I know, the butter was too soft, or I didn't measure the flour precisely enough, but come on! Where was my fool-proof recipe for MY ideal cookie?!
Well. Here it is. It's Anna Olson's secret ingredient that did the trick. She subsitutes a portion of the baking soda with corn starch, and oh. my. goodness. Soft, chewy, perfect every time. You'll want to double this recipe, because it only yields 24 cookies, and I promise that will not last you long enough. I made 62 of these babies last night, and 12 of them had mysteriously disappeared by the time I got home from work today. Apparently, we have cookie gremlins...
Secret Weapon Chocolate Chip Cookies
3/4 cup unsalted butter, softened
1 cup brown sugar
1/4 cup granulated sugar
1 egg
2 teaspoons vanilla extract (I always double the amount of vanilla, but that's up to you)
2 cups all purpose flour
2 teaspoons cornstarch
1 teaspoon baking soda
1/2 teaspoon salt
8 ounces bittersweet chocolate, cut into chunks
1. Cream together butter and sugars until smooth. Add egg and vanilla and mix until incorporated.
3. Stir in flour, cornstarch, baking soda and salt. Add chocolate chips.
4. Drop by tablespoons onto a greased baking sheet and bake for 8-10 minutes at 350 degrees, until golden brown around the edges.
5. Set up a gremlin detection system to protect your new treasure.
Well. Here it is. It's Anna Olson's secret ingredient that did the trick. She subsitutes a portion of the baking soda with corn starch, and oh. my. goodness. Soft, chewy, perfect every time. You'll want to double this recipe, because it only yields 24 cookies, and I promise that will not last you long enough. I made 62 of these babies last night, and 12 of them had mysteriously disappeared by the time I got home from work today. Apparently, we have cookie gremlins...
Secret Weapon Chocolate Chip Cookies
3/4 cup unsalted butter, softened
1 cup brown sugar
1/4 cup granulated sugar
1 egg
2 teaspoons vanilla extract (I always double the amount of vanilla, but that's up to you)
2 cups all purpose flour
2 teaspoons cornstarch
1 teaspoon baking soda
1/2 teaspoon salt
8 ounces bittersweet chocolate, cut into chunks
1. Cream together butter and sugars until smooth. Add egg and vanilla and mix until incorporated.
3. Stir in flour, cornstarch, baking soda and salt. Add chocolate chips.
4. Drop by tablespoons onto a greased baking sheet and bake for 8-10 minutes at 350 degrees, until golden brown around the edges.
5. Set up a gremlin detection system to protect your new treasure.
Labels:
chocolate,
chocolate chip,
chocolate chip cookies,
dessert,
recipe
Monday, December 3, 2012
Cranberry Crumble Bars
Need an excuse to eat some more cranberries? Look no further. This crumble bar has it all: nuttiness, sweetness, a wonderfully messy texture.
I originally pinned this recipe from The Daily Garnish, but made a few little tweaks to punch it up a bit. Oh, and I made it even more easy by using a store-bought cranberry sauce. (Trader Joe's was out of fresh cranberries, and I just couldn't wait for a new shipment to come in!) Feel free to substitute your favorite berry sauce for this, though; I think it would be superb with 2 cups of blueberry jam, a blackberry compote, or Haley's excellent homemade cranberry relish. Substitute pecans for almonds, or add more sugar if you want it to be sweeter. This recipe is totally open for interpretation.
Cranberry Crumble Bars (modified from The Daily Garnish)
1 15 oz. tub of cranberry sauce (or desired berry filling)
1 1/4 c. rolled oats
1 c. whole wheat flour
1/2 c. almonds
1/2 c. coconut oil
1/4 c. maple or agave syrup
1/4 c. brown sugar
1 tsp. cinnamon
1. Preheat oven to 350.
2. Combine all ingredients except sauce in a food processor and pulse until coarsely ground.
3. Press half the crumble in an 8x8-inch pan, spread sauce on top, and press the rest of the crumble on top. Pop in the oven for 30 minutes.
4. Allow to cool for at least 30 minutes, then cut into 9 squares and serve! (JP says they would be best served warmed with ice cream on the side- who am I to argue?)
Wednesday, October 31, 2012
Brown-Butter Toffee Blondies
These past few days have involved a fair bit of cabin fever, rain, and just enough butter to keep us in hibernation mode. We've come through the storm no worse for the wear, though our home has sustained a few leaks and we could literally see our windows bending from 70 mph winds. Tuesday morning, however, has ushered in decidedly fall weather, and I couldn't be happier to break out my peacoat for the cooler temperatures. And, of course, it's time to start on the fall baking.
There is something very autumnal about toffee. The burnt, nutty, sugariness (surely that's a word) just screams, "Enjoy me by the fireplace!"
It didn't get cold enough during Hurricane Sandy to justify a fire, but it didn't stop me from baking a tray of Martha Stewart's Brown-Butter Toffee Blondies to keep my hands busy. And mouth. Man, these bars are superb! Between the two of us, JP and I have polished off 1/3 of the pan in just two days.
Definitely keep a close eye on the butter while it's browning, as it's a fine line between 'golden brown' and 'burnt black.' I also added chocolate chips instead of walnuts because, well, I like chocolate better than nuts.
Not sure if these count as a halloween dish, but, if so, they would count as a 'treat.' Yum!
There is something very autumnal about toffee. The burnt, nutty, sugariness (surely that's a word) just screams, "Enjoy me by the fireplace!"
Not sure if these count as a halloween dish, but, if so, they would count as a 'treat.' Yum!
Wednesday, October 17, 2012
Single Serving Chocolate Lava Cake
Ladies, THIS IS IT. Do you have a single girl night in coming up? Feel like eating an indulgent dessert but don't want a gazillion leftovers? Like cake batter, but warmed up and more fancy? This is your dessert.
JP was out of town this weekend, and I had Saturday night all to myself. Gossip Girl was already to go on my Netflix, comfy elastic-waist pants were on, and I just needed something warm in my belly. As is my recent routine, I rifled through my Joy The Baker Cookbook, and landed on this recipe. It's got 6 ingredients, which I already had in my fridge and pantry, and gave me an excuse to use our wedding 8-ounce ramekins (the things you register for during wedding planning...).
Single Girl Melty Chocolate Cake (from Joy the Baker Cookbook, Joy Wilson, 2012)
1 Tbsp. unsalted butter
1/4 c. semisweet chocolate chips
1 large egg
4 tsp. sugar
Pinch of salt
1 tsp. all-purpose flour
1. Preheat oven to 375 degrees, and place cookie sheet in oven as it heats up. Generously flour and butter an 8-oz. (1 cup) ramekin.
2. Place butter and chocolate into a microwave-safe container (I used my glass measuring cup) and heat in microwave until both are melted, maybe 40 seconds. Set aside to cool.
3. In a small bowl, whisk together egg and sugar. Pour chocolate mixture into bowl and whisk until well incorporated. Add salt and flour and mix until just combined.
4. Pour batter into prepped ramekin and place in oven on top of cookie sheet. Bake 7-10 minutes; the less time it's in the oven, the more oozy the middle will be. (The top should be set, though, so you can turn it out onto a plate!)
5. Remove from oven and cool for 2 minutes. Using pot holders, invert cake onto plate and devour.
JP was out of town this weekend, and I had Saturday night all to myself. Gossip Girl was already to go on my Netflix, comfy elastic-waist pants were on, and I just needed something warm in my belly. As is my recent routine, I rifled through my Joy The Baker Cookbook, and landed on this recipe. It's got 6 ingredients, which I already had in my fridge and pantry, and gave me an excuse to use our wedding 8-ounce ramekins (the things you register for during wedding planning...).
It's your typical chocolate molten center cake: dark and rich, with a cake shell encasing an oozing fudge center. Double the recipe for a dessert for two, quadruple it for a small dinner party, but there's no shame in doling out the single-serving for you. I'm sure you deserve it.
Single Girl Melty Chocolate Cake (from Joy the Baker Cookbook, Joy Wilson, 2012)
1 Tbsp. unsalted butter
1/4 c. semisweet chocolate chips
1 large egg
4 tsp. sugar
Pinch of salt
1 tsp. all-purpose flour
1. Preheat oven to 375 degrees, and place cookie sheet in oven as it heats up. Generously flour and butter an 8-oz. (1 cup) ramekin.
2. Place butter and chocolate into a microwave-safe container (I used my glass measuring cup) and heat in microwave until both are melted, maybe 40 seconds. Set aside to cool.
3. In a small bowl, whisk together egg and sugar. Pour chocolate mixture into bowl and whisk until well incorporated. Add salt and flour and mix until just combined.
4. Pour batter into prepped ramekin and place in oven on top of cookie sheet. Bake 7-10 minutes; the less time it's in the oven, the more oozy the middle will be. (The top should be set, though, so you can turn it out onto a plate!)
5. Remove from oven and cool for 2 minutes. Using pot holders, invert cake onto plate and devour.
Labels:
cake,
chocolate,
dessert,
lava,
recipe,
single serving,
single serving chocolat lava cake
Wednesday, October 3, 2012
Pumpkin Seven Layer Magic Bars
Yowza, these bars are good! Picture this: a crumbly graham cracker crust layered with basically a pumpkin pie filling, a firm bite of Granny Smith apples, and topped with chocolate chips, butterscotch pieces, almonds, and a sprinkling of coconut.
It's like a piece of autumn just fell into your mouth.
Of course, I tweaked things a bit: decreased the coconut, added butterscotch, used more almonds than suggested. I just always think of the topping of a bar cookie as a recommendation, not something that's actually been written in stone. Don't mess with the proportions of eggs, flour, etc., but everything else is fair game. My heart wanted butterscotch in these bars.
I certainly can't deny my heart's desires, can I?
Enjoy these with good company, and I do think they would be an excellent addition to a Thanksgiving dessert bar. You hear that, Dad? I may be serving these up down in Florida...
It's like a piece of autumn just fell into your mouth.
I found this recipe on Bakers Royale, and had to make them immediately. Some friends came over for a movie night last weekend, and I served these up to counteract the bitterness left in our mouths after Arbitrage. Nothing to cure cynicism like sweetened condensed milk.
I certainly can't deny my heart's desires, can I?
Enjoy these with good company, and I do think they would be an excellent addition to a Thanksgiving dessert bar. You hear that, Dad? I may be serving these up down in Florida...
Wednesday, August 29, 2012
Oatmeal Raspberry Scones
What are you doing right now if you're not making these scones?! You're wasting your life! Annie's Eats posted Joy the Baker's awesomely tart and slightly sweet breakfast pastry, and you've just got to make them.
Go ahead. I'll wait.
These scones come together really easily; I actually just used an ice cream scoop to get the dough onto the baking sheet (rather than rolling it onto a floured surface), which made it a bit more simple.
They feel so fancy and end-of-summer appropriate. You'll love them.
Tuesday, June 19, 2012
S'mores Bars
My work life has been hum-drum as of late. Oh, don't worry, it's nothing drastic, just that a neighboring graduate assistant has recently switched buildings, and she brought a lot of delicious food. I guess as a law student, she baked to fill the void that torts and will-writing just couldn't. The people on my floor really raked in the sugary goodness, with our mornings of chocolate chip cookies and even wild rice chicken salad. A few weeks ago, she brought in some s'mores bars and, after one bite, I practically groveled at her feet for the recipe. Lo and behold, before she peaced out, she wrote up the how-to (on her own recipe index card!) and bequeathed it to me.
It's a decadent, summery dessert: sugar cookie ingredients mixed with graham cracker crumbs, gloriously sweet Hershey's bars, and gooey marshmallows. I've made these the last two weekends, and they go like hot cakes at barbecues and taco nights!
In lieu of a handwritten index card, I'm just going to link you to the same recipe online. Not quite as charming, but a bit more practical in terms of blogging purposes.
It's a decadent, summery dessert: sugar cookie ingredients mixed with graham cracker crumbs, gloriously sweet Hershey's bars, and gooey marshmallows. I've made these the last two weekends, and they go like hot cakes at barbecues and taco nights!
Monday, May 14, 2012
Red Wine Chocolate Cake
I'm a little behind on blog posts. This recipe is actually from our one-monthiversary on April 24. Goodness, we're already several weeks into this whole marriage thing!
The story with this cake is simple: it's incredibly delicious, rich, and full-bodied with a nose of berries. (Is that a thing?) Red wine gives the cake a lovely deep red tint, although you should know that the alcohol does NOT completely bake out. Not only does this mean that you'll definitely taste the wine in the cake batter (you know, if you're into that whole raw batter/dough thing), but it means you'll have to refrain from serving it to small children.
Now, the story behind the decision to make this cake and how we came to eat it is a little more simple: it sounded good, and we wanted to splurge on a random Tuesday that was only important to us. It's the little things that sometimes get you through the days, and this day in particular was a little rough. JP's job has been requiring a lot of his time lately (well, more than what we're used to), and I wasn't really expecting the first months of marriage to feel different (they do). Our 30-day mark happened to fall on the day before JP had to fly to Texas for several days, and then he ended up being home 3 hours later than I expected. There were two options: be mad and sulk throughout the dinner to celebrate us or be happy to get this time with JP and be supportive and loving when he got home. I chose the latter. I'm learning that marriage, and life in general, is sometimes just being happy with chocolate cake and your husband, and letting the other things fall by the wayside. If you make this cake, be in the moment of making it, savoring the bites, licking the powdered sugar off your fingers. Life is better that way.
The story with this cake is simple: it's incredibly delicious, rich, and full-bodied with a nose of berries. (Is that a thing?) Red wine gives the cake a lovely deep red tint, although you should know that the alcohol does NOT completely bake out. Not only does this mean that you'll definitely taste the wine in the cake batter (you know, if you're into that whole raw batter/dough thing), but it means you'll have to refrain from serving it to small children.
Now, the story behind the decision to make this cake and how we came to eat it is a little more simple: it sounded good, and we wanted to splurge on a random Tuesday that was only important to us. It's the little things that sometimes get you through the days, and this day in particular was a little rough. JP's job has been requiring a lot of his time lately (well, more than what we're used to), and I wasn't really expecting the first months of marriage to feel different (they do). Our 30-day mark happened to fall on the day before JP had to fly to Texas for several days, and then he ended up being home 3 hours later than I expected. There were two options: be mad and sulk throughout the dinner to celebrate us or be happy to get this time with JP and be supportive and loving when he got home. I chose the latter. I'm learning that marriage, and life in general, is sometimes just being happy with chocolate cake and your husband, and letting the other things fall by the wayside. If you make this cake, be in the moment of making it, savoring the bites, licking the powdered sugar off your fingers. Life is better that way.
Labels:
cake,
chocolate,
dessert,
recipe,
red wine chocolate cake
Monday, April 23, 2012
Peanut butter cup-chocolate chip-pretzel cookies
We should really call this recipe "The only thing that can pull JP away from Top Gear." I pinned these cookies a month ago on Pinterest (is there anyone out there who isn't completely sucked into that site?), and finally had some time to bake them yesterday.
HOLY BANANAS. You have to make these cookies. Make them for someone you love who loves you back and will appreciate how wonderful they are. I used mini chocolate peanut butter cups, as I couldn't find peanut butter chips at either of my grocery stores within walking distance; I highly suggest you do the same, even if you can find pb chips!
I also crushed up pretzel sticks with my hands; in hindsight, I would just crush them in a bag with a rolling pin or something so they were a bit smaller. They didn't stay as crunchy as I would have liked; if you use the same recipe with different results, let me know your secret.
The rest of the cookie is soft and chewy, with the distinctive sweet tastes of both milk and dark chocolates. Peanut butter adds a nice slightly savory contrast. Trust me, just whip up a quick batch.
We enjoyed these on the couch on a day filled with rain in DC, along with some puppy cuddling, followed quickly with a nap. Few things are better than falling sleep on the couch with your family on a belly full of cookies.
HOLY BANANAS. You have to make these cookies. Make them for someone you love who loves you back and will appreciate how wonderful they are. I used mini chocolate peanut butter cups, as I couldn't find peanut butter chips at either of my grocery stores within walking distance; I highly suggest you do the same, even if you can find pb chips!
I also crushed up pretzel sticks with my hands; in hindsight, I would just crush them in a bag with a rolling pin or something so they were a bit smaller. They didn't stay as crunchy as I would have liked; if you use the same recipe with different results, let me know your secret.
The rest of the cookie is soft and chewy, with the distinctive sweet tastes of both milk and dark chocolates. Peanut butter adds a nice slightly savory contrast. Trust me, just whip up a quick batch.
We enjoyed these on the couch on a day filled with rain in DC, along with some puppy cuddling, followed quickly with a nap. Few things are better than falling sleep on the couch with your family on a belly full of cookies.
Subscribe to:
Posts (Atom)